The automation of processes and products in the agribusiness sector has proved to be a very promising niche. Strategies go through smart equipment and to data acquisition for decision making. And one of the first needs that comes to mind when thinking about these possibilities, is to measure the moisture in the plantation soil.
To this end, there are many options, most of them focused on solutions based on resistance change, resistive, which has the great disadvantage of the rapid degradation of the sensor due to the electrolysis effect. Therefore, we will use the HW-390, which uses a strategy aimed at changing capacitance in the sensor, capacitive.
The HW-390 is a module consisting of a fixed frequency oscillator, based on the CI 555 (Timer), which generates a square wave and is then return it in the form of an analog signal, ranging from 0 to 3V, which is altered by capacitive change imposed on the receiving terminals. In this case, the higher the soil moisture, the greater the capacitance of the sensor, and consequently the higher the signal read, the reverse is also true.
The detail is that this sensor can operate in a voltage range between 3.3 and 5.5V, and is often connected to the Arduino through the 3.3V port, which forces the AREF pin to be also connect to the 3.3V voltage, to equalize the levels of voltage when reading analog ports, which by default is 5V. But this strategy usually causes more inconvenience than benefit, especially if you have to take other readings to other analog sensors that operate only at 5V. And as regardless of the connection, many tests will need to be done to adjust and understand which readings are best suited to your needs, for this, we will keep the entire system operating at 5V.
The detail is that in the image, the reference sensor has version v1.0. However, the connection is the same for version v2.0 and others, what changes is the quality that the sensor itself has in making the readings with greater precision and durability.
As mentioned earlier, we decided to keep the system operating voltage at 5V, the standard for Arduino. And that the sensitivity range of the sensor is from 0 to 3V, therefore, the calculation of equivalence between the two proportions.
 |
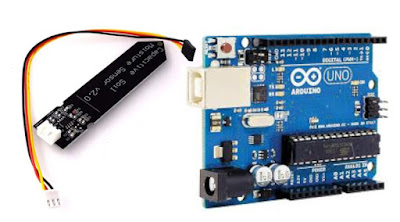
| Figure 1 - HW-390 and Arduino |
The sensor
The detail is that this sensor can operate in a voltage range between 3.3 and 5.5V, and is often connected to the Arduino through the 3.3V port, which forces the AREF pin to be also connect to the 3.3V voltage, to equalize the levels of voltage when reading analog ports, which by default is 5V. But this strategy usually causes more inconvenience than benefit, especially if you have to take other readings to other analog sensors that operate only at 5V. And as regardless of the connection, many tests will need to be done to adjust and understand which readings are best suited to your needs, for this, we will keep the entire system operating at 5V.
The circuit
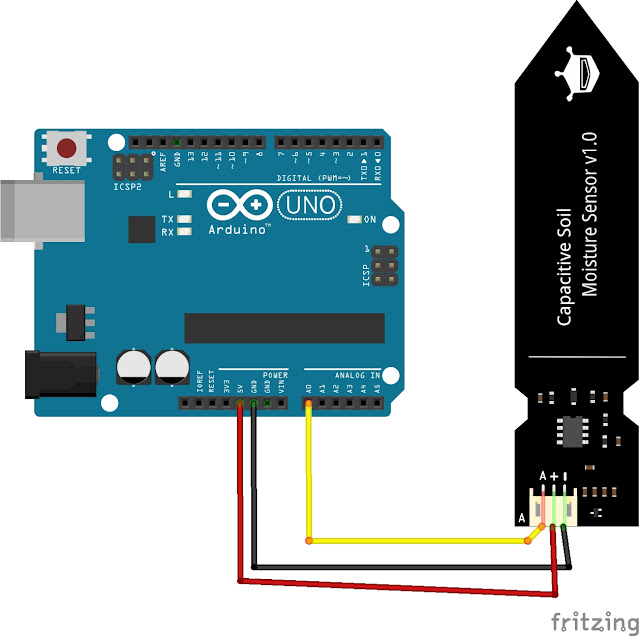
Connecting the HW-390 to the Arduino is simple and requires nothing but a few Jumpers. Material:
- 1x - HW-390 Capacitive Soil Moisture Sensor
- 1x - Arduino
- 3x - Jumpers
 |
| Figure 2 - Assembled Circuit |
The detail is that in the image, the reference sensor has version v1.0. However, the connection is the same for version v2.0 and others, what changes is the quality that the sensor itself has in making the readings with greater precision and durability.
The code
HW-390 (Capacitive Soil Moisture Sensor) with Arduino
 Reviewed by AJ Alves
on
quinta-feira, janeiro 28, 2021
Rating:
 Reviewed by AJ Alves
on
quinta-feira, janeiro 28, 2021
Rating:


Nenhum comentário:
Postar um comentário