One of the first big doubts for those starting with Arduino is when you need to deal with components, modules, equipmenta, more complex than the usual, such as a water pump. So let's get to the teachings.
 |
| Figure 1 - Micro Water Pump and Arduino |
The actuator
For this post we will use, as shown in Figure 1, a micro water pump to connect to the Arduino. This micro pump has a maximum lifting capacity of 40 to 110 cm and a flow between 80 and 120 L/h, but this data is only relevant for its final application, for example, it could be used for small aquarium filters, but not for irrigation of a corn field.
The data that interests us at the moment are: It operates at a voltage between 2.5 and 6 V, its activator is a DC (Direct Current) motor, working current between 130 and 220 mA and power in the range of 0.4 and 1.5 W.
At the other end, we will use an Arduino digital port, which can switch between 0 and 5 V, to control the status of the pump. However, the I/O ports provide a maximum current of 40 mA (20 mA, recommended), after all, they are not designed to "power" other devices.
In general, motors (which is what makes this pump work), will always need an intermediary to be controlled by an Arduino, either because of the working current, as in this case, or also by the working voltage, they are very common in 12, 18, 24 V.
The intermediary
For our device, we just need something that works like a digital switch, after all, we are only interested in turning the pump on and off. Then we will use a popular transistor, the TIP41C.
 |
| Figure 2 - TIP41C transistor |
This is an NPN transistor, meaning that when it receives a high signal (HIGH) at the base (B), it allows current to flow from the collector (C) to the emitter (E). Other important details are that this transistor can work with a voltage of up to 100 V and 6 A, which would give us the chance to control pumps much larger than the one we have.
The last detail is that transistors are not simply keys, it means that the current or voltage that will flow, in NPNs through C->E, depends on the current or voltage that is imposed on B. In the case of the TIP41C, only the current matters and it will be a multiplication around 70 units of the one supplied in the base. For example, with the 40 mA of the Arduino digital pin, the current that will flow through the collector->emitter will be about 2.8 A.
The circuit
In order to assemble the circuit we will just add a resistor, in this case, to ensure a safe current to the specifications of the Arduino board and that it is also suitable for the pump. We will use a 330 R, following Ohm's law, U = R*i => 5 V = 330 R * i => i = 5 V / 330 R => i = 15 mA, thus ensuring the maximum current of 15 mA on the Arduino digital port, since the recommended limit is 20 mA (with a maximum of 40mA), and it is more than enough current for the pump. Parts:
- 1x - Mini water pump
- 1x - Transistor NPN TIP41C
- 1x - 330 R resistor
- 1x - Arduino
- 1x - 5 V external power supply
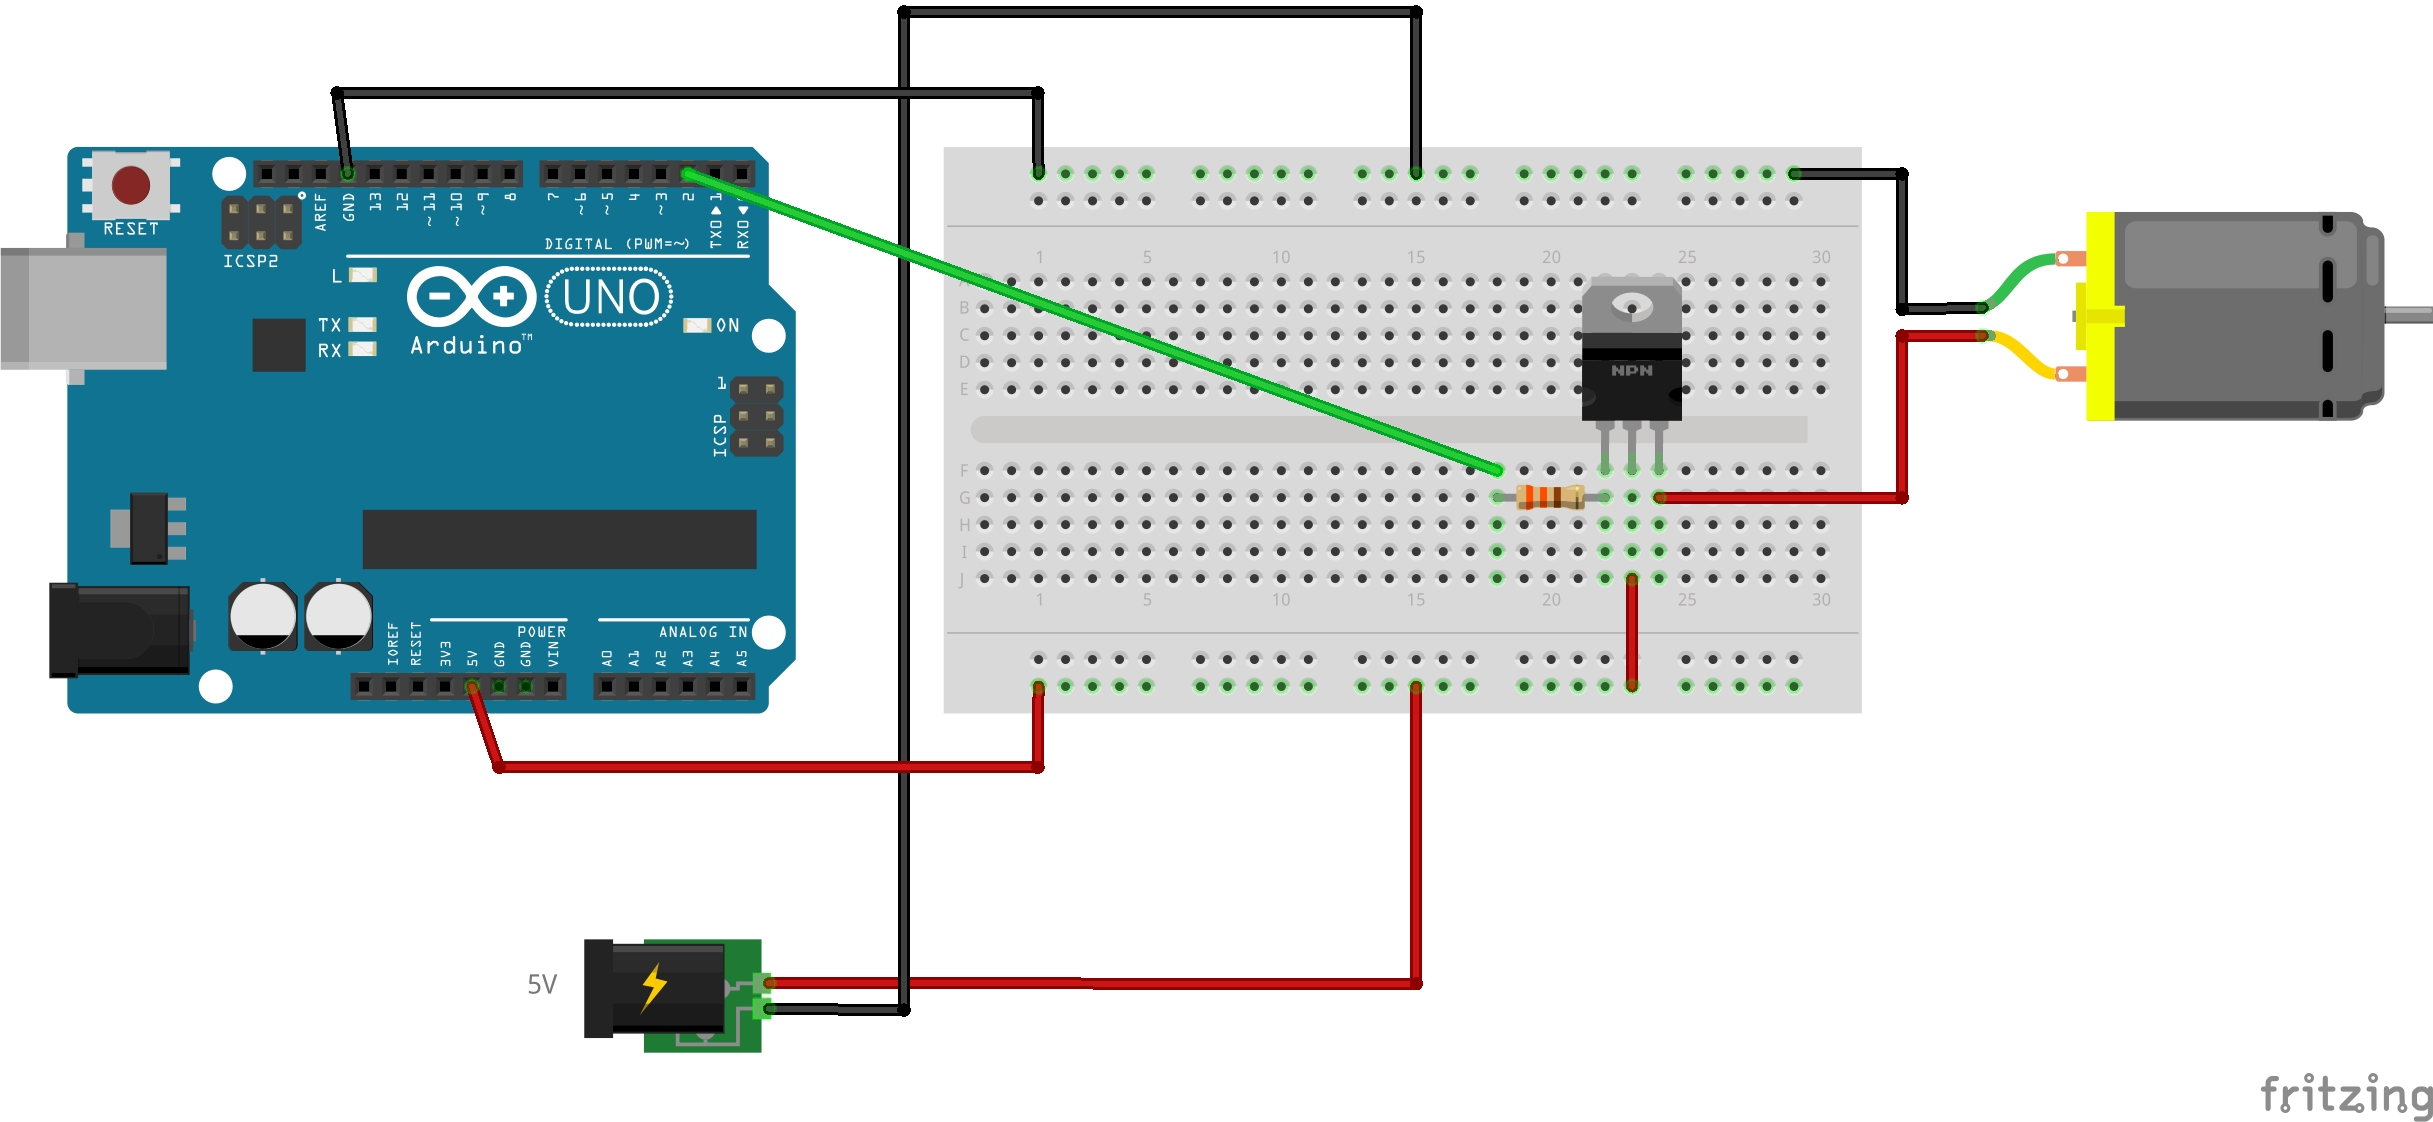 |
| Figure 3 - Assembled Circuit |
Note that DC motors rotate in one direction if connected in one polarity, and in the other direction if the connection is reversed. See the wires, red for positive and black for negative, and connect correctly, so that the pump works as expected, not as a sucker.
The code
In terms of code, there is no much to explore, if the pin is marked as HIGH, the pump will be turned on, if LOW, it will be turned off.
 Reviewed by AJ Alves
on
segunda-feira, março 04, 2013
Rating:
Reviewed by AJ Alves
on
segunda-feira, março 04, 2013
Rating:


 with Arduino")


Nenhum comentário:
Postar um comentário